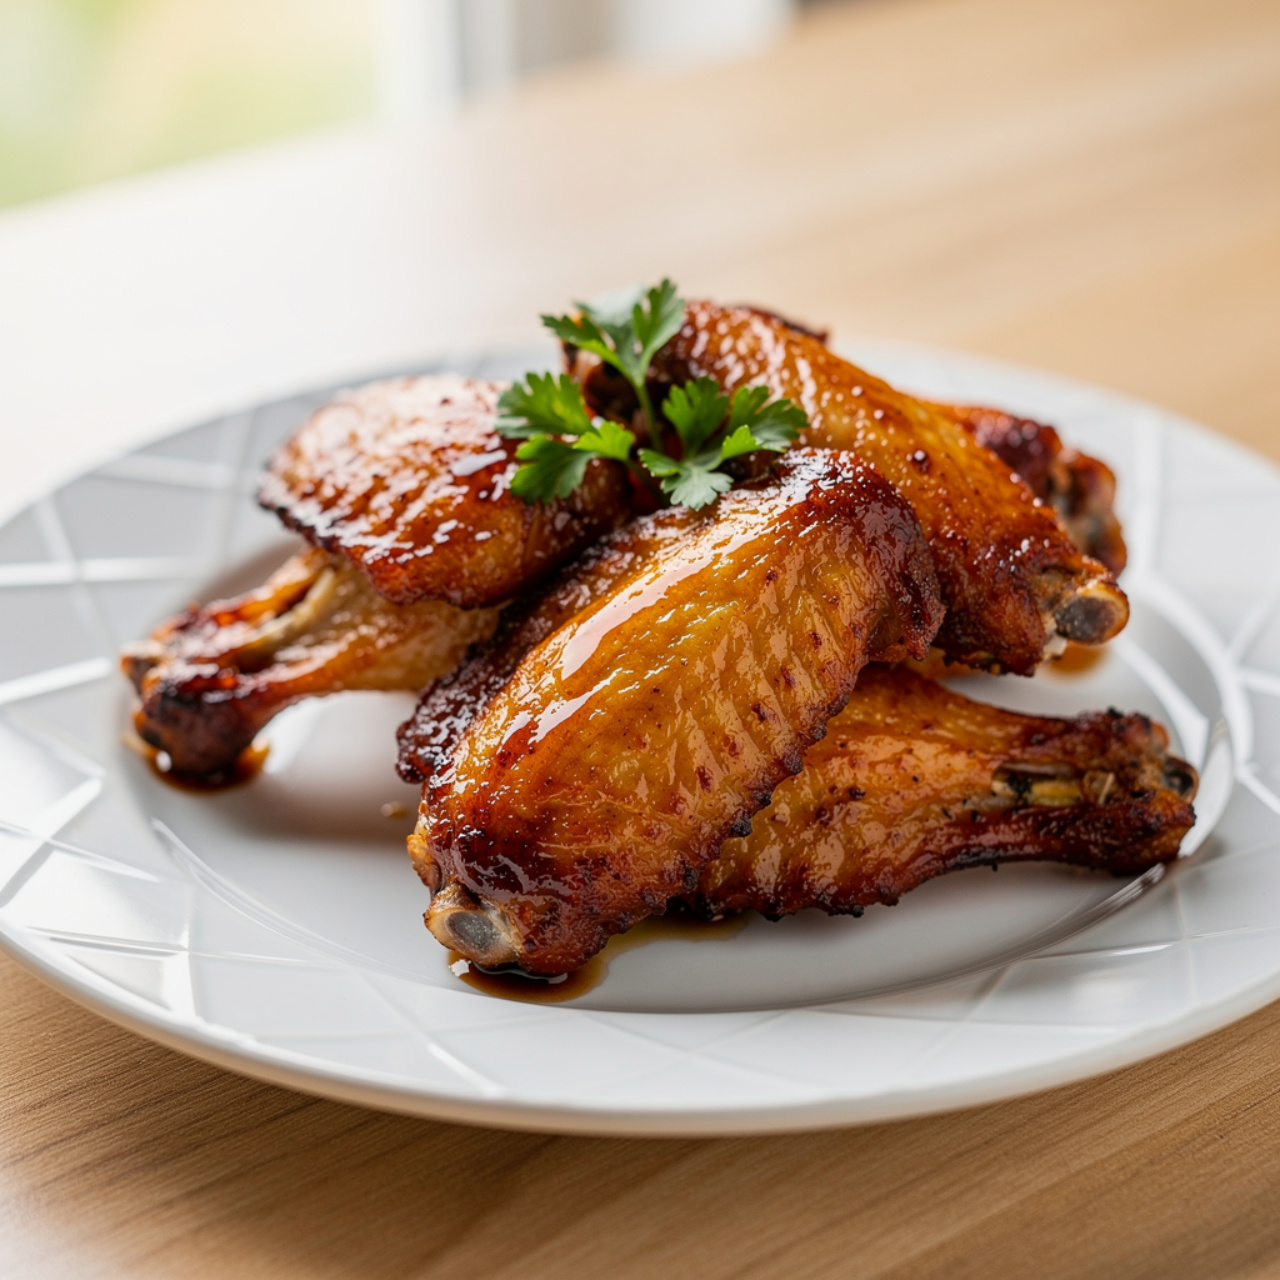
Crispy Baked Chicken Wings (No Frying Required!)
These crispy baked chicken wings use a simple baking powder trick to deliver shatteringly crunchy skin straight from your oven. No frying, no fuss, just perfectly crisp baked chicken wings every single time.

The Secret to Perfectly Crispy Baked Chicken Wings
If you have ever pulled a batch of baked wings out of the oven only to find pale, rubbery skin staring back at you, you already know the frustration. Fried wings are easy to get right. Baked ones? That takes knowing one simple trick that changes everything.
The secret is baking powder. Not baking soda. Not cornstarch. Plain, aluminum-free baking powder tossed right onto the skin before baking. This tiny addition transforms ordinary whole chicken wings into crunchy baked chicken wings that genuinely rival anything coming out of a deep fryer. Food science at its most delicious.
These are the crispy baked chicken wings I make for every game day, every potluck, every time someone says "you should bring food." They disappear in minutes, every single time.
Why This Method Works So Well
The baking powder trick is backed by real chemistry. It raises the pH level of the chicken skin, which speeds up the Maillard reaction (that beautiful browning process) while simultaneously drawing moisture to the surface so it can evaporate in the oven heat. The result:
- Shatteringly crisp skin with zero frying
- Deep golden color that looks just as good as it tastes
- Juicy, tender meat underneath, never dried out
Pair this with a hot oven, a wire rack for airflow underneath each wing, and the patience to flip halfway through, and you have the formula for perfectly crisp baked chicken wings every time.
Chef's Tip: Pat your wings completely dry before seasoning. Even leaving them uncovered in the fridge for 30 minutes after drying will make a visible difference in how crispy the skin gets.
Tools and Ingredients That Actually Matter Here
Getting this recipe right is mostly about technique, but having the right setup genuinely helps. A sturdy wire rack set inside your baking sheet is what makes the hot air circulate under each wing so you get crunchy baked chicken wings on all sides, not just the top. Using an aluminum-free baking powder keeps the flavor totally clean, with no metallic aftertaste whatsoever.
Choosing Your Wings
This recipe works beautifully with whole chicken wings, wingettes (flats), or drumettes. Whole wings give you the most dramatic presentation and tend to stay juicier. If you buy whole wings and want to split them yourself, a sharp chef's knife or kitchen shears makes quick work of the joint.
Whatever cut you choose, buy fresh over frozen when you can. Frozen wings carry more internal moisture and need extra drying time before they will crisp up properly.
Sauce Options
These wings are versatile enough to wear almost any sauce. Some crowd favorites:
- Classic Buffalo: hot sauce and melted butter, tossed on right out of the oven
- Honey Garlic: sweet, sticky, and completely irresistible
- Dry rub only: just the seasoning blend, no sauce, for pure crispy satisfaction
- BBQ: brush on during the last 5 minutes of baking for a caramelized finish
Ready to Make the Crispiest Wings of Your Life?
Here is everything you need to make these crispy baked whole chicken wings from start to finish:
Crispy Baked Chicken Wings (No Frying Required!)
These crispy baked chicken wings use a simple baking powder trick to deliver shatteringly crunchy skin straight from your oven. No frying, no fuss, just perfectly crisp baked chicken wings every single time.
Ingredients
- 2 lb whole chicken wings, patted very dry with paper towels
- 1 tbsp baking powder, aluminum-free; do NOT substitute baking soda
- 1 tsp kosher salt
- 1 tsp garlic powder
- 1/2 tsp smoked paprika
- 1/2 tsp black pepper, freshly ground
- 1 tbsp neutral oil, such as avocado or canola oil
- 1/2 cup your favorite wing sauce, buffalo, honey garlic, or BBQ; optional for tossing after baking
Instruction
Place an oven rack in the upper-middle position and preheat your oven to 425 degrees F (220 degrees C). Line a large baking sheet with foil and set a wire rack on top. Spray the rack with nonstick cooking spray.
Using paper towels, pat the chicken wings as dry as you possibly can. This step is non-negotiable for truly crispy baked chicken wings.
In a large bowl, whisk together the baking powder, kosher salt, garlic powder, smoked paprika, and black pepper.
Add the wings to the bowl and drizzle with the oil. Toss to coat evenly, then sprinkle the baking powder mixture over the wings and toss again until every wing is thoroughly coated.
Arrange the wings in a single layer on the prepared wire rack, leaving space between each piece. Do not crowd them.
Bake for 25 minutes, then flip each wing and continue baking for another 20 to 25 minutes until the skin is deep golden brown, crackly, and crispy.
If you want extra color, broil on high for 2 to 3 minutes at the very end, watching closely to avoid burning.
Remove from the oven and let rest for 5 minutes. Toss immediately in your sauce of choice, or serve plain with dipping sauces on the side.
Equipment
- Large rimmed baking sheet
- Oven-safe wire rack
- Aluminum foil
- Large mixing bowl
- Instant-read thermometer
- Tongs
Notes
Serving, Storing, and Making Ahead
Serve these wings hot, straight from the oven. Have your dipping sauces ready: blue cheese, ranch, or a simple garlic aioli all work perfectly.
For leftovers, skip the microwave entirely. It turns crispy skin into a sad, steamy version of itself. Instead, reheat in an air fryer at 375 degrees F for 5 to 6 minutes or back in a 400 degree F oven on a wire rack for about 10 minutes. The crunch comes right back.
Planning ahead for a party? Season the wings with the baking powder mixture up to 24 hours in advance and leave them uncovered on a rack in the fridge. The extra time drying out in the refrigerator actually makes the skin crispier once they bake, so it is a genuine win-win.