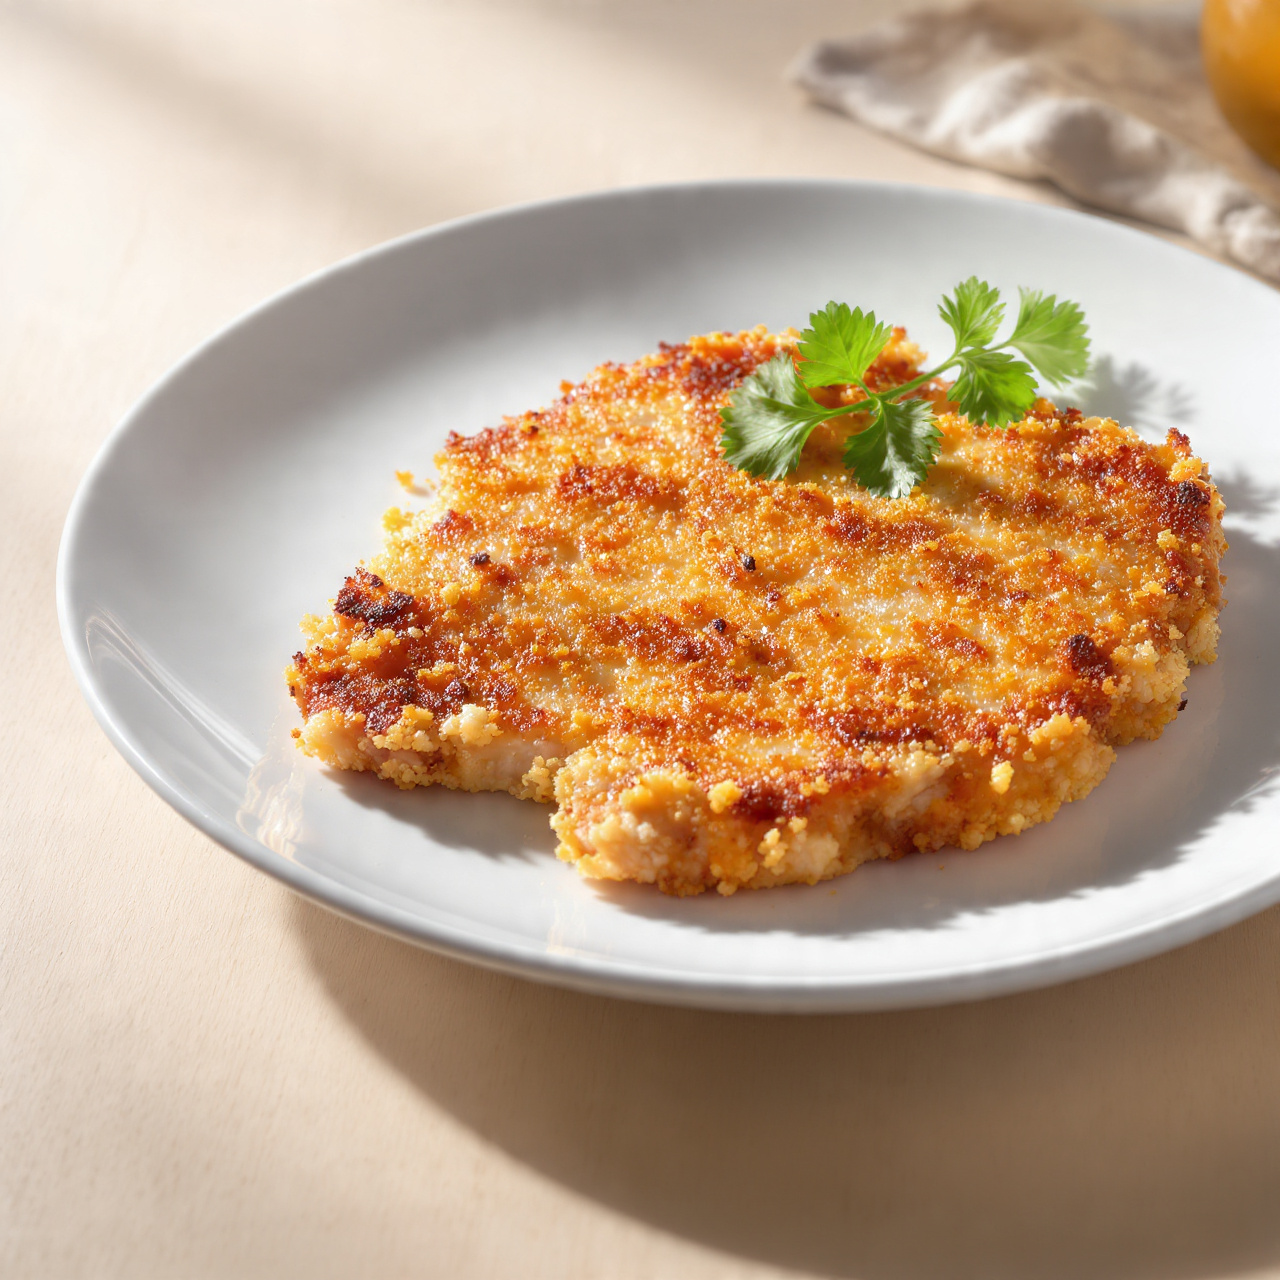
The Best Crispy Fried Chicken Strips Recipe
These homemade crispy fried chicken strips are golden, juicy, and packed with flavor. An easy chicken tenders preparation the whole family will beg for on repeat.

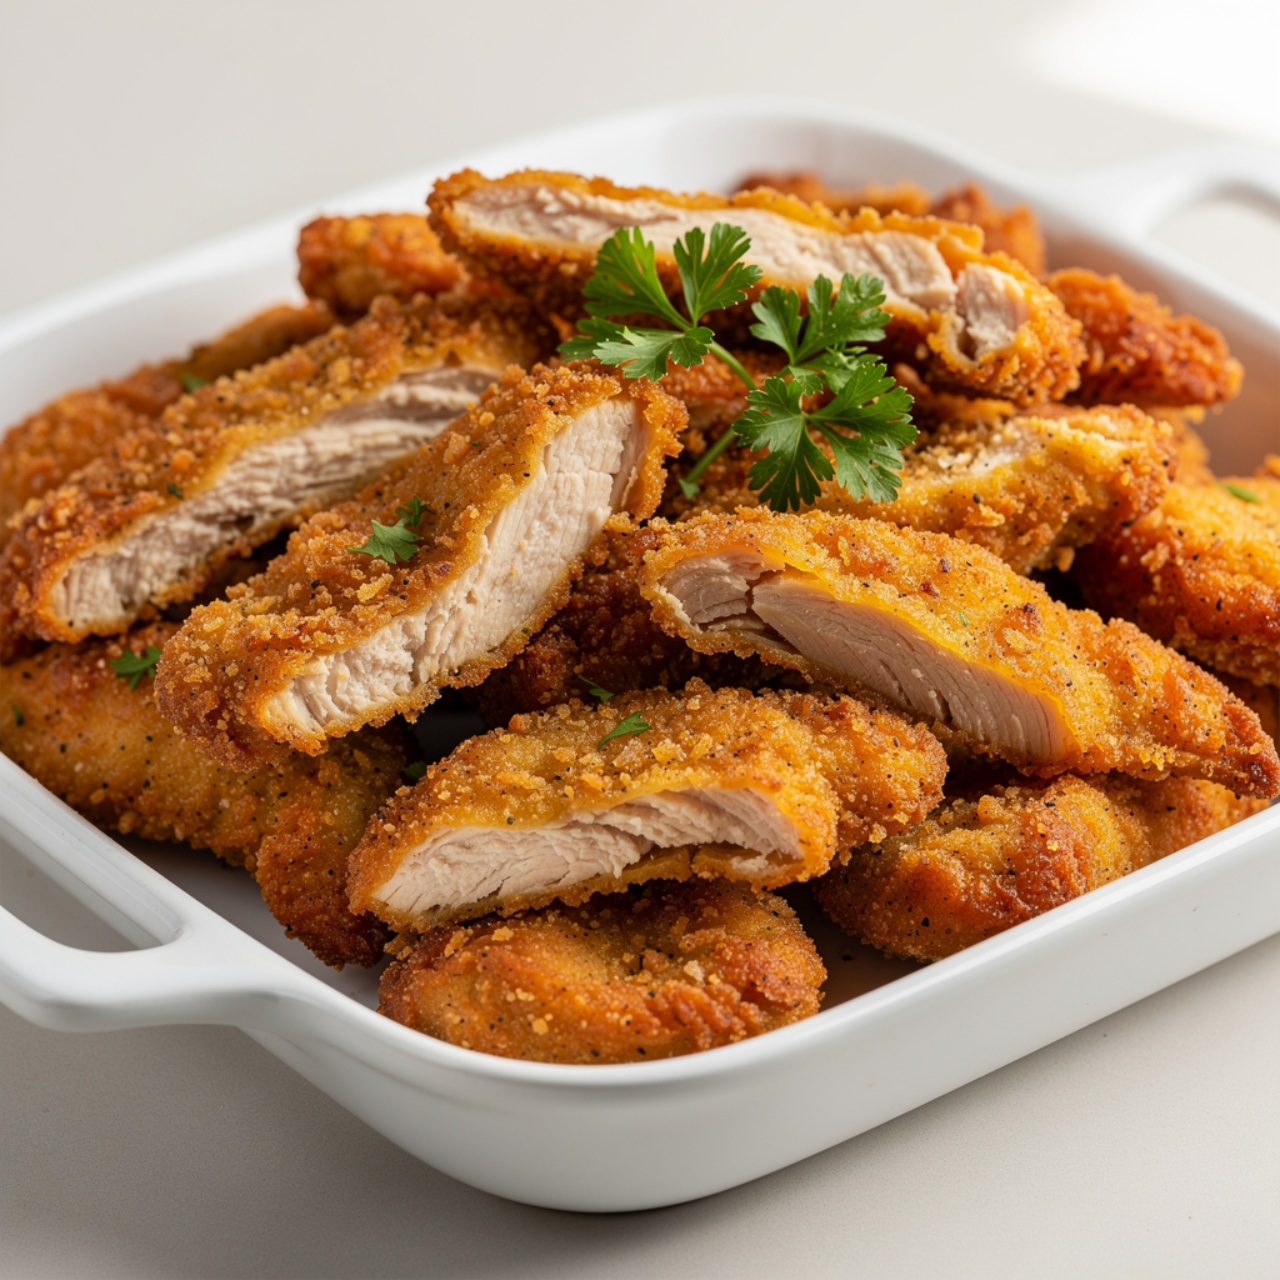
The Only Crispy Fried Chicken Strips Recipe You Will Ever Need
Some recipes promise crispy and deliver soggy. Not this one. These homemade fried chicken strips come out of the oil with a shatteringly crunchy golden crust and a center that stays impossibly juicy every single time. Whether you are feeding picky kids on a Tuesday night or setting up a game-day spread, this is the best fried chicken tenders recipe to have in your back pocket.
The secret is a three-step coating system, a splash of buttermilk, and one humble pantry ingredient that most fried chicken recipes skip: cornstarch. It is the key to that signature crunch that stays crispy even after the strips have been sitting on the table for a few minutes.
Before you start, it genuinely pays to have the right equipment in your corner. A reliable instant-read thermometer takes all the guesswork out of deep frying, keeping your oil at the sweet spot and your chicken safely cooked through. A sturdy wire rack is equally non-negotiable for draining without losing that crust.
Why This Homemade Chicken Tenders Snack Hits Different
Fast food chicken tenders have their place, but once you try a properly made deep fried chicken tenders recipe at home, there is no going back. You control the seasoning, the oil quality, and most importantly, the freshness. These strips are seasoned all the way through with smoked paprika, garlic powder, and a whisper of cayenne that builds gentle warmth without overwhelming heat.
The buttermilk and egg wash does two important jobs at once. It tenderizes the chicken through mild acidity and creates the sticky base layer that the panko breadcrumbs cling to. Panko, rather than regular breadcrumbs, gives you those dramatic, jagged edges that fry up light and airy instead of dense and bready.
Chef's Tip: Never skip drying your chicken strips with paper towels before breading them. Moisture is the enemy of crunch. Dry chicken means the flour coating adheres cleanly and your oil temperature stays stable when the strips hit the pan.
How To Make Seriously Tasty Chicken Tenders at Home
This easy chicken tenders preparation follows a simple flow: season, dredge, dip, press, and fry. Setting up your three-bowl breading station before you start keeps the process clean and fast.
The most important number to remember is 350 degrees F. Too low and the coating absorbs grease and turns heavy. Too high and the outside burns before the inside is cooked. Fry in small batches so the oil temperature does not drop, and give each strip enough room to float freely.
Once they come out of the oil, rest them on a wire rack, never on paper towels. A wire rack lets air circulate underneath so the bottom stays just as crunchy as the top. Hit them with a small pinch of salt the moment they come out of the oil, while the surface is still glistening. Salt sticks better and seasons more evenly when the food is hot.
Ready to make the best chicken tenders recipe you have ever put together at home? Here is everything you need:
The Best Crispy Fried Chicken Strips Recipe
These homemade crispy fried chicken strips are golden, juicy, and packed with flavor. An easy chicken tenders preparation the whole family will beg for on repeat.
Ingredients
- 1 1/2 lb boneless skinless chicken breasts, cut into strips about 1 inch wide
- 1 cup all-purpose flour
- 1/4 cup cornstarch, the secret to extra crunch
- 2 large eggs, beaten
- 1/2 cup buttermilk
- 1 cup panko breadcrumbs
- 1 tsp garlic powder
- 1/2 tsp onion powder
- 1 tsp smoked paprika
- 1/4 tsp cayenne pepper, optional, for heat
- 1 1/2 tsp salt, divided
- 1/2 tsp black pepper, freshly ground
- 3 cups vegetable oil, for deep frying
Instruction
Pat the chicken strips completely dry with paper towels. Season all over with 1 teaspoon of salt and the black pepper. Set aside.
In a shallow bowl, whisk together the buttermilk and beaten eggs. In a second shallow bowl, combine the flour, cornstarch, garlic powder, onion powder, smoked paprika, cayenne, and remaining 0.5 teaspoon of salt. In a third shallow bowl, spread out the panko breadcrumbs.
Working one strip at a time, dredge the chicken in the flour mixture and shake off any excess. Dip it into the egg and buttermilk wash, letting the excess drip off. Press it firmly into the panko breadcrumbs so they stick on all sides. Place the coated strip on a wire rack and repeat with the remaining chicken.
Pour the vegetable oil into a large heavy-bottomed pot or Dutch oven and heat over medium-high heat until it reaches 350 degrees F (175 degrees C). Use a thermometer for accuracy.
Working in batches of 3 to 4 strips at a time, carefully lower the chicken into the hot oil. Fry for 5 to 6 minutes, turning once halfway through, until deeply golden and the internal temperature reads 165 degrees F (74 degrees C).
Transfer the cooked strips to a wire rack set over a baking sheet. Never drain them on paper towels, as this steams the coating and softens the crust. Season lightly with a pinch of salt right after they come out of the oil.
Serve immediately with your favorite dipping sauces and enjoy while hot and crispy.
Equipment
- Large heavy-bottomed pot or Dutch oven
- Instant-read thermometer
- Wire rack
- Baking sheet
- Three shallow bowls or dishes
- Spider strainer or slotted spoon
- Paper towels
Notes
Serving, Storing, and Variations
These fried chicken tender strips are endlessly versatile. Serve them with honey mustard, ranch, spicy buffalo sauce, or a simple squeeze of lemon for something lighter. Pile them into a hoagie roll with slaw for a killer sandwich, or slice them over a Caesar salad for an easy weeknight dinner that feels a little more put-together.
For storage, keep leftovers in an airtight container in the fridge for up to 3 days. Reheat in a hot oven or air fryer to bring the crust back to life. Avoid the microwave at all costs.
If you want to mix up the flavor profile, swap the smoked paprika for Cajun seasoning, add a tablespoon of hot sauce to the egg wash, or finish the strips with a drizzle of honey and a pinch of chili flakes for a Nashville-style kick. Once you have the base technique down, the variations are endless.